Saturday, October 27, 2012

Tropical Terrarium Build (part 1)

I've been talking about if for a while now, so it's about time I made a post for it; after many delays, here is a look at my tropical terrarium.
Bet that was anti-climactic! The truth is, being my first build of this kind, it's taking even more time on top of all the delays. Lacking the proper techniques definitely slows down the process! But I've come up with a few by trial and error, such as stringing up the wood that I'm siliconing in before spray-foaming. I'll get to those tips later on, I'm just giving a bit of a status report on it at this point.

If it looks at all crowded from this picture, that's because it is. In fact, that's what I'm going for. I want maximum amount of furnishing without over-crowding. Also, this picture doesn't really capture the scale of this build; the tank is 18" x 18" x 24". I mean, I can fit my head in there... so it's big. Trust me.

As show to the right, here, you can see that there is in fact much room for plants. I also feel I should mention that since this particular shot was taken, I added a bunch of foam to the bottom corners to build them up. The reason for this is to minimize the amount of substrate needed in areas where it's not really useful to have it.

Something else clearly visible is how painfully close my pots are to the top of the tank. This is something I learned the hard way to look out for. In the end, I'm sure it'll be fine. The only problem is one of the two pothos plants I wanted to put there is kind of... growing up instead of growing like a vine. I may try to transplant parts of it, or maybe just buy a new one. I'll probably have the room for a third one down at the bottom.

Quick price break down:
-Great Stuff Pond and Stone (which is the black kind): 9.00$/can, 3 cans
-Aquarium Silicone (price carried over from the leopard gecko build): 13.00$
-See previous posts for prices of plants and wood (I hope...)
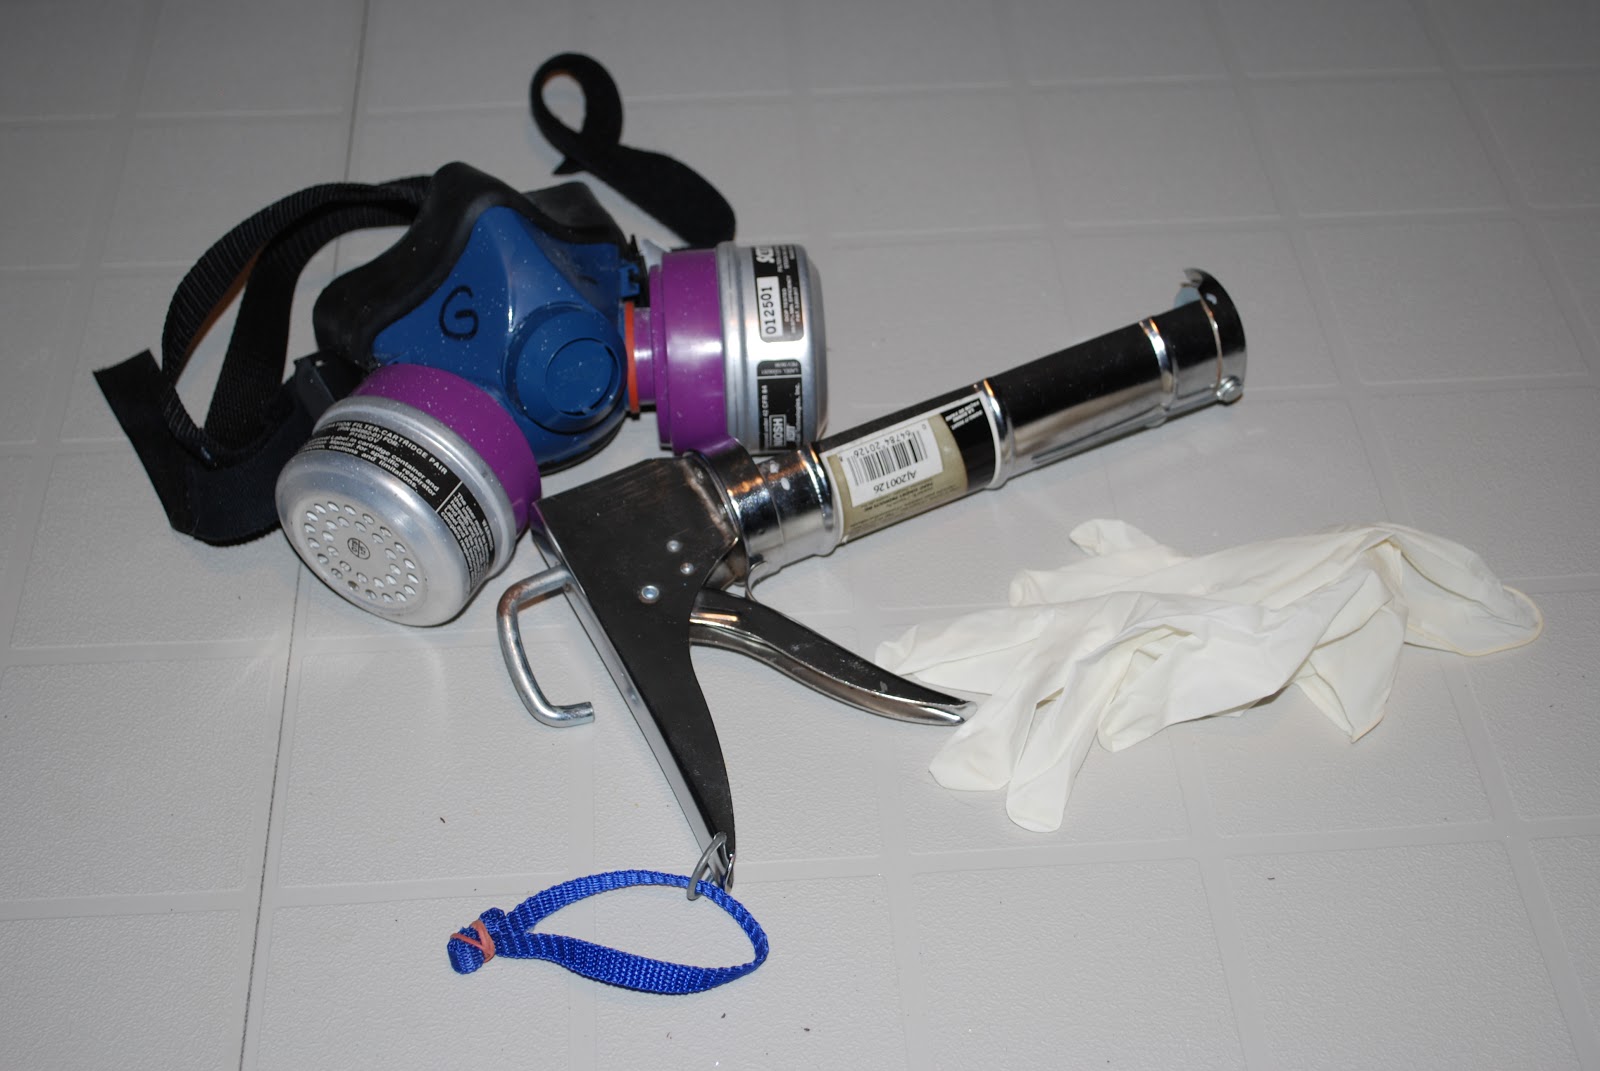
Some of the tools I used include:
-Breaking Bad costume Breathing mask
-Caulking gun
-Many pairs of disposable rubber gloves.

All of these I had lying around the house. At this point, I also want to point out that I don't condone the use of disposable latex gloves; be kind to the environment and get some nice rubber gloves that you can use again and again. Yes, I am a hypocrite.

I won't add the substrate costs just yet, at least not until I have a better idea how much I will use. Hopefully, Amanda at The Pet Store will live up to her standards and get me some good aquarium silicone by the end of the week!

Leopard Gecko Build (part 3)


Finally, some new pics of my first rock outcrop project!


As is clearly shown, I have painted my rocky outcropping and I've even managed to seal it. Heck, I've even managed to put a nick in it! Fortunately for me, it's in the back, where it won't be visible.

For a bit of an idea of the price of this part of my build, check out my quick break down:
-Rona Sanded Grout: 10.00$
-Rona No Sheen Grout Sealant: 10.00$
-Liquitex Matte Varnish: 20.00$

Throw in some left-over acrylic paint and some old brushes I had kicking around, and there you have it.

All I really have left to do now is give it a bit of a washing, but only once I touch up my little ding. I was going to put on a third coat of varnish, but after the second, I find that it starts to get a little cloudy. Since I don't intend on this piece to go in a humid environment, I think two coats should do just fine. The Liquitex is made for outdoor use, after all.

Quick fun fact; i made some crappy little cave paintings inside, just for funzies.

This build turned out way bigger than I had originally anticipated! I will definitely need a new tank soon. Thankfully, Christmas is just around the corner! I'm thinking possibly one of Exo-Terra's new Low models, but that's going to depend on prices.

I digress; next post on this particular project will be the conclusion post, wherein I will give a total break down of what I used and what I would not use again, as well as helpful tips for getting a natural finish and how to avoid annoying bubbles in your varnish!

Friday, October 26, 2012

Much-Needed Updates

(FECK! I just spent way too long writing a post that I jsut deleted!)

Alright, so here's a long story made short, since I just deleted a good couple paragraphs of information.

---

Been busy these past couple months; lots of school and volunteer work.

Lots of delays in getting my black aquarium silicone.
Aqua Zoo had me pay up front, plus extra for shipping, only to get me the wrong product two months later. That's a no-no.

Amanda at The Pet Store has ordered me some, though it has not come in yet due to shipping issues, she hasn't charged me anything.

Plus, she ordered me Zoo-Med Clay Hydro Balls and Terrarium Mesh in exactly one day; that's from ordering to receiving. Booyah.

Waiting on her black silicone to compare with what dick-face Mr. Aqua Zoo got me (which I couldn't return because he wasn't there as usual and his staff can't do anything without him).

That's why I'm late in my projects.

---

Sadly, lost my venus flytrap (Dionaea muscipula) to cat attacks.

Lost my moss to dehydration, though I may still use it as dried moss.

Worried my philodendron (Monstera deliciosa) might not be getting enough humidity locked away in my basement, trying to avoid cat bites.

Pothos and Sansevieria doing amazingly well; truly idiot-proof plants.

---

Leopard gecko build nearly finished.

Spent lots of time hunting a better varnish.

Found one. Applied a coat; looked good. Applied a second coat; not so good. Won't be putting a third on. Still need to wash it for a bit and soak off all excess varnish. Post to come later with pictures, materials, and details.

Tha'ts it for now. I'm ticked off at my incompetence with blog posts.

Wednesday, August 29, 2012

More Plants

For part two of today's posts, I'm showing off the newest plants I got for my cresty build. To be fair, "new" is relative, as I have had these for a couple weeks now, and despite a little feline intervention, the majority of them are still alive!

Firstly, I picked up another pothos, but instead of a Jade pothos, I picked up a Gold pothos.
I also found this really nice philodendron which has the best leaves ever! Perfect for a shy little gecko to chill out on. As time goes on, the leaves will develop splits and become more articulated. It also spreads fairly well, I'm told, so I'll be trimming it fairly often.

Also, I finally found the perfect sized snake plant, which sadly became the target of a cat attack and lost a couple leaves...
Lastly, and this one might not make it through to the terrarium, is this cute little Venus Fly-trap. I've fed it several times, forgetting that each "mouth" only feeds once before it dies. So, as a result, I'm left with a plant with very few mature "mouths". Still seems to be living though, so, yay!
Also, though I didn't technically buy this, I harvested a little moss from my back yard and have so far been able to keep it alive on nothing but a rock, so kudos to me!

I plan on incorporating most of these plants, if not all, and a couple more into my cresty build, which, as it happens, I'm currently in the process of building! Finally! I'll definitely post phase 1 tomorrow, when I have a few more things completed.


Leopard Gecko Build (part 2)

Lots of new events going on this past month, which is why I plan on making a second post after this. Just trust me on this one.

I'll start off with the foam rock I'm making for my leo.
After re-evaluating the size of my setup and the size of the rock I was making, I decided to cut it down a bit, leaving me with this:

If you can see it, I've also added a tunnel going from the main chamber and exiting on the side. I figured this build is goign to take up a lot a floor space, and that by adding layers like this, I'm just adding on to the amount of space my leo will have to explore and hunt. There's also a secondary chamber inside which would be visible from the back.

After a little YouTubing, I found this great video by Beckywheeler (check her out), who has a TON of DIY foam background videos. Her technique for making foam rocks look more natural is to torch them with a lighter. I supose an actual torch would work here too, but that just seems like over-kill to me. My BBQ lighter did a great job, even with its sputtering little flame.

So after torching all the flat surfaces to give them a more pitted, uneven texture, and after torching down the 90 degree corners, I ended up with something like this:
And, I don't mean to gush, but for my first foam construction, I've exceeded all my own expectations! I even went as far as to torch the inner tunel and chambers, which really make it look like rock, I think.


Also, a couple weekends back, I bought some grout and some sealer, so all I need now is to find my old acrylic paint and I'll be able to wrap this project up!

Tuesday, July 24, 2012

Got Wood?

First off, as promised, the pics of my new swag loot that I got the other weekend:


I did a bit of research into the mopani wood, since I want to learn how to get rid of the sap once and for all. I guess, from what I've read, I just have to keep soaking it and boiling it.

More disturbing are the horror stories I'm coming across of how the tannins can cause fungal grows, psychological disabilities in the animals, and a mess of other things. But then I read posts from people who've been using this stuff for decades. I think it's a case of improper preparation, personally.

Still enough to worry me though.

Side Note: I am still looking for a decent-sized pot to boil my wood pieces in. Got them soaking for now, but I want to boil them a couple times before siliconing them in place. I just wish I knew how much OSAP I'm getting this year! It's kind of my limiting factor as to what I can and can't buy. With all the (long) extra hours I've scored at my job, I should have enough spare cash to really trick out my tanks, at least if my price estimates are decent.

So my question today is this: 

Is mopani wood dangerous for reptiles, and more specifically, crested geckos?

From what I've been reading on Reptile Forums UK and Herp Center, it should be fine. Lots of people use it, and have been using it for years without any incident.
To be fair, the stories I read about where the animals developed neurological symptoms were talking about different species of geckos. And in all honesty, it doesn't seem unthinkable that some species have different reactions to different types of plants or wood.
My greatest fear is that once I've foamed my wood pieces in places, something will occur that will force me to remove them, along with my entire background. It's not like these tanks are cheap to decorate, so I want to get this done, and get it done right.

***

Next on my hit list is a bromeliad plant! Maybe a crawling vine too. I also need to repot that jade pothos, in order to remove as much of the fertilizer as possible.

Sunday, July 15, 2012

So many goodies!

I just got back from Ottawa today with a couple bags of funky stuff for both my terrariums. At Big Al's, I found some nice little pieces of mopani wood that I'm going to use as accents for both my tropical and arid terrariums, along with some Malaysian drift wood. On my way back across the plaza, I stopped in at Rona's garden center and was really surprised by this young guy there who was quite savvy about tropical houseplants. I bought a jade pothos plant, though I could have bought a lot more! They had snake plants and a whole mess of everything. Lastly, on my way past PetSmart, I stopped in for the heck of it and found a cork round. All in all, a pretty decent haul, and all of it for under 40$! I think I'm good for wood now. All I need is some fake rocks which I plan to make myself, some substrate and a couple other miscellaneous goods and I will be ready!

Also, I got my new top in from Stacey's, which I ordered a week and a half ago to replace my rusting one temporarily while I mod it up a bit. It looks like the tops I've been using up till now were Exo-Terra's older models, as this one isn't exactly the same. I'm hoping it will still fit, just to use it as a temporary lid. It was only 15$, after all, so I don't feel that bad. If it doesn't I can always return it.

Pictures to follow.